Several months ago I decided to create a full scale CAD model of the locomotive from the Nature's Wonderland Railroad using Autodesk Fusion 360 CAD software. That effort was aided greatly by James Keeline's impressive collection of vintage Disney documentation and memorabilia.
 |
| Fusion 360 CAD Rendering |
I was already aware of Sam Towler's
Mine Train Thru Nature's Wonderland HO Scale model. It is an impressive labor of love. I wasn't looking to start a project of that magnitude, but still wanted to have the correct look and feel of the original NWRR engine, tender and cars. The engine was designed by R. L. Stein and the cars were done by Bob Gurr, who also had some recollections of the tender/power unit.
 |
| Mine Train thru Nature's Wonderland HO Scale Model |
Looking around for reference material and a real scale model to start from, I discovered there aren't many scale model locomotives which looked like the NWRR engine. For some reason the Porter tank engine is a much more popular than the little tankless 0-4-0 engines. One popular On3 Scale model is the Bachmann 0-4-2. The only problem with these is that the boiler shell does not extend under the saddle tank and the diameter of the motor is larger than the boiler shell, so simply removing the tank won't work.
 |
| Saddle Tank removed |
The H.K. Porter & Company made a range of Light Four-Wheel-Connected Tank Locomotives, varying in hauling capacity from 175 to 550 tons, with driving wheels from 20 to 30 inches in diameter. The little B-S Class "Kirche" engine was adapted to narrow gauge tracks. Her overall dimensions were about 9'4" tall and 10 1/2 to 11 1/2 feet long;
 |
| Porter 0-4-0 BS Locomotive |
Disney historian James Keeline thought the NWRR engine was styled after a 0-4-0 Baldwin named Joe Douglas, which is currently on display at the Nevada State Railway Museum.
Joe Douglas
Looking thru the Porter catalogs online, the Joe Douglas appears very similar to the 2-B-R Class 0-4-2 with a slightly extended cab, but Porter also made a Light Plantation Engine, the B-RR-K, which looks even closer because of it's balloon smokestack. Another difference is that the Porter domes have hemispherical tops, while the Baldwin dome tops are stepped.
The Porter B-RR-K Plantation Engine
LGB made G Scale 0-4-0 Porters for twenty years, many of which were for their starter sets. A visit to eBay indicated that many were still available, both new and used.
I wanted to know if the boiler shell on one of the LGB engines was removable - and what was underneath - so I purchased a Helena "for parts or restoration." Much to my delight, the saddle tank came off easily, revealing a complete one piece boiler. At this point I was anticipating an easy conversion!
 |
First LGB Helena in pieces
|
 |
| A Side by Side Comparison NWRR vs. LGB Porter |
The first task was to knock out the windows and take off the saddle tank, which is held in place with four screws. The cab is fastened with screws located around the perimeter. The front of the boiler shell is held down by two screws just inboard from the cylinders. I also stripped out the electronics and removed the smoke generator from the stack, as I was anticipating needing to do some milling.
 |
| Cab Windows Removed - Note the "Class BS" marking in the lower right corner. |
 |
| Front mounting bosses, Lamp and Motor Diode Board |
The front bumper is also held in place with two screws. The rear bumper fits into two square holes and has snaps, although they don't appear to work very well. Once you remove the rear coupler, the rear bumper pries off downwards.
What remained looked a lot like the Joe Douglas and was definitely a couple of steps closer to the NWRR engine;
 |
| Helena un-saddled and de-windowed |
This is also where things began to go off the rails. The replacement LGB 62201 Universal Motor that came with the rest of the Helena parts did
not fit the 1990 vintage frame. My hopes for a quick, easy conversion stated to fade. I learned later that there were at least three different motors and two different gear sets, depending on whether the builder was LGB, Lehman, or Bachmann in Germany, Korea, or Hungary.
While I waited to hear back from the seller about possibly swapping out the motor, I decided to put a coat of grey primer on the smoke stack, cab and boiler sections. Before doing that I removed the saddle tank mounting flanges *completely* from the boiler shell, using a razor saw and a half round file.
LGB used Glass Filled Nylon for their early parts. GFN is very stiff, strong and easy to modify by machining, filing or cutting with a saw. It is also very stable dimensionally and makes for very close tolerance parts. The later parts built by Bachman in Korea do not appear to be GFN.
 |
| Primer Coat Applied |
The next step was to use the sand and steam dome CAD models I'd created in Fusion 360 as the basis for 3D printing new parts. I decided to create a cap for the
existing steam dome and a full sand dome at the same body diameter - these were
smaller in diameter than would be correct for the full size NWRR engine, but matched and fit the diameter of the LGB boiler steam dome. These were ordered thru Shapeways in their best grade of resin - which is glass filled nylon, like the original LGB parts.
 |
| Fusion 360 Sand Dome Body and Cover model |
 |
| NWRR Color Change |
While waiting for the 3D printed parts to arrive, I went to work on painting the cab and boiler. This was fairly easily done in three steps, utilizing small cans of Krylon spray paint. I would later discover that Testors 1214 Gloss Yellow was the best match.
The glass filled nylon took the paint well
if it was primed, but I was disappointed in the way the Testors arcylic model paint flowed out on the cylinders and steam chest. Paint adhesion and flow out would also be a problem on another cab I purchased later for engine #3. Ultimately, I decided to only use enamel paint.
At this point I still wasn't sure what to do about the motor problem. I'd been checking eBay and the web looking for an older motor, but none were to be found. However, there was a newer chassis available, so I decided to give that a try. That purchase was the beginning of my Masters in the History of LGB.
 |
| 2001 Vintage Lehman branded Chassis |
LGB - Lehmann Gross Bahn - was founded by Ernst Paul Lehmann Patentwerk in 1968. The 2008 market crash led to bankruptcy and Märklin eventually ended up the owner. Walthers took over from Lehmann's American subsidiary when Märklin bought the other LGB assets. Most of the European models were manufactured in Germany, while much of the North American rolling stock was made in China. Some models were also made in Korea or Hungary.
One result of these changes in ownership is that the parts and part numbering changed more than once. For example; the 1990 vintage 2077/050 LGB cab became part number 20771.30 under Märklin. This was very confusing and complicated my search for a replacement motor and headlamps. Without knowing some German (or Google Translate) and having the owners manual for the particular model you are working with, finding spares can be very challenging. Marklin doesn't even offer the boilers or cabs as replacement parts.
Most recently, Bachman has been selling it as the Lehman Sugar Plantation locomotive. There is also a
Lake George and Boulder range, each with slightly different color schemes. I was interested in the differences because some of the engines have driver wheels with red spokes and hubs - like the NWRR engines. Painting those had been somewhat tedious and the acrylic paint didn't flow out well.
The very early NWRR engine and tender were green, brown and black. That changed to a yellow, red and white livery later. The Lake George and Boulder
"Rusty" engine had a green cab and red tank, which came pretty close to what I needed, although it still had black wheel spokes and chromed brake shoe assemblies which the NWRR loco lacked. The headlamp was also the wrong shape and the number plate was all brass.
 |
| Bachmann Lake George and Boulder Rusty engine |
I initially had decided to repaint the cab, cylinders and wheel hubs with the appropriate NWRR yellow, red and green colors. That turned out to be a lot of work and I started to wonder if there might be a simpler way to do the livery change.
Of all the LGB Porters the
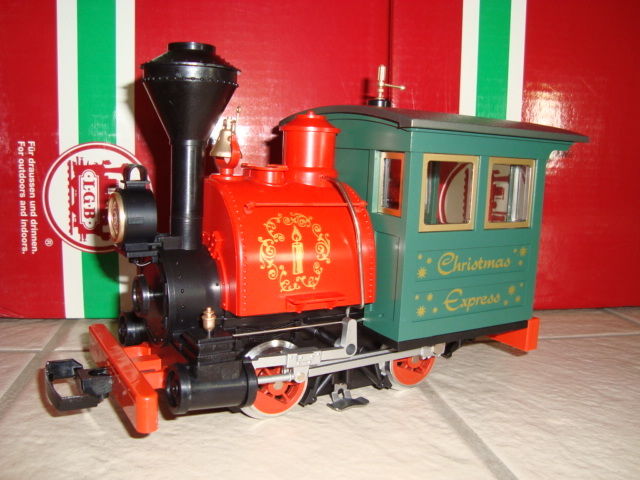
Christmas Express comes the closest to filling the basic color scheme. It has an all black boiler shell, green cab and red-spoked drive wheels. The black cylinders, bumpers and steam chest are relatively small parts to paint. Only the cab's exterior and roof needed a color change. One was available on eBay, so I decided to explore its possibilities.
 |
| The Christmas Express Arrives |
The image at the top of this article is Engine #1. It was unpowered, owing to the motor and frame being mismatched. Fitted with a new steam dome cover, sand dome, injector and sand tubes made from 10 and 12 gauge solid copper wire and inserts for the cab sides, it looked pretty good!
Starting from the Christmas Express allowed me to only paint the exterior of the cab and not paint the boiler or smoke stack. By this time I had received a second set of 3D printed parts from Shapeways, so the headlamp could also look correct. The cab side panels were made from styrene model sheet. I also downsized the injector tubes to #12 wire, which is easier to form than the #10 wire I'd used on Engine #1.
I wanted to see if I could figure out a way to do it all with simple hand tools, since I felt that many modelers might not have a mini-mill, which I'd used to open up the front middle window and flatten both cab side panels. I also wanted to see if there was a way to reduce the amount of painting even further. Engine #2 was my first step towards that simpler solution.
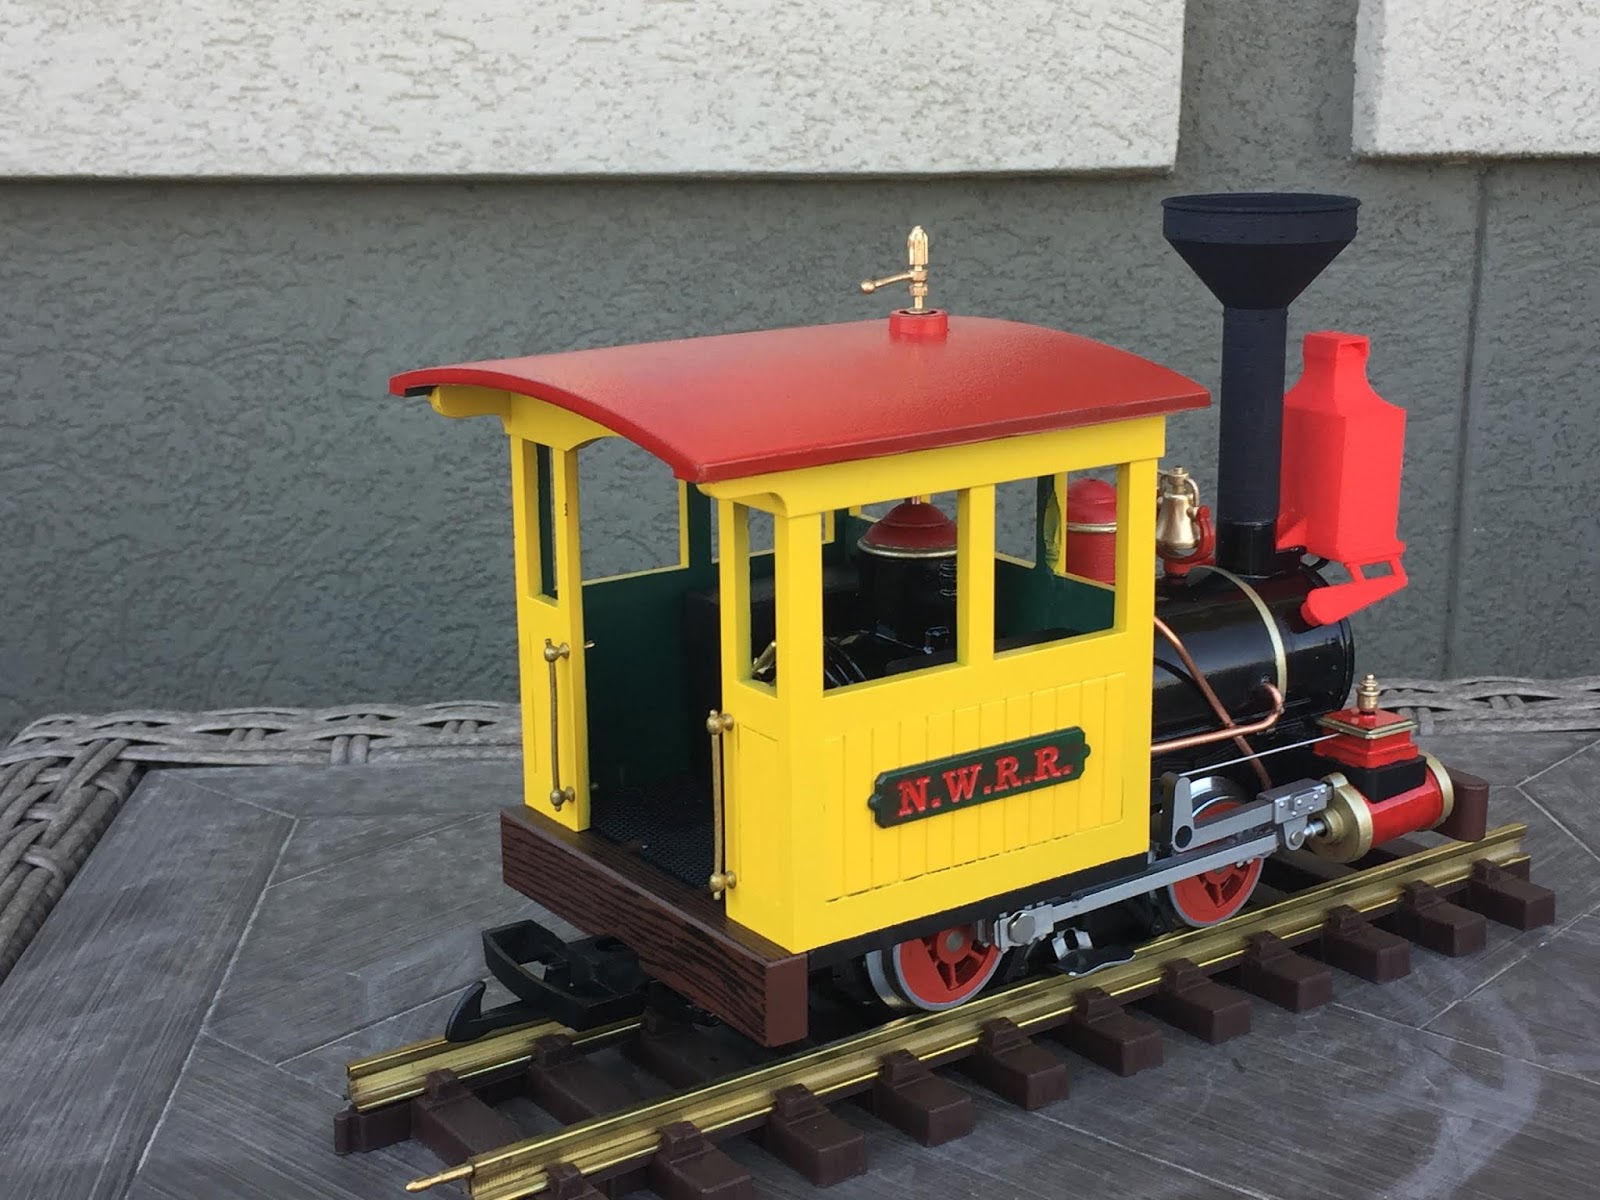
Christmas Express based Engine #2
The latest version, Engine #3, is partly an exploration of ways to simplify the injector tube mounting and get a more authentic look on the cab sides. I went back to machining and used a ball end mill to simulate the joints between the cab side panel slats and open up the front center window. The plastic inserts I'd made for #2 were .040" thick, so there had been no surface relief on the cab sides, which looked wrong. Milling on the cab was the only thing preventing the conversion from being all bolt-on and only needing hand tools. If you don't feel the need to open up the middle front window and have recessed side panels you can just make half inserts or try and locate an affordable set of side panel insert replacement parts for the Big Thunder starter set.
 |
| Engine #3 waiting for her stack and sand dome |
 |
| The new stack was a bit too tall! |
The only appropriate comment for this image is; Measure Twice, Cut Once! I decided to fix it in the next build, which had a resized a steam and sand dome and headlamp which are more closely proportioned closer to the full size NWRR engine.
 |
| 22771-E198 Cab Insert |
 |
| Big Thunder Starter Set |
On engine #3 I kept part of the saddle tank mounting flanges, cutting them back to 3/16" wide and milling a trough down their length to act as a tray for the #12 copper wire. Previously I'd also drilled holes in the boiler shell and cab front panels for the the injector tubes, which complicated things when mounting the cab. On Engine #3 the wire stops just outside the front of the cab. On #3 I also chose to go with the earlier Rainbow Caverns Mine Train black and dark green paint scheme.
Along the way I also built new 3D CAD models of the cylinders, headlamp, smoke stack, sand dome and steam dome cover which reflect the NWRR as built and which are "bolt-on" replacement parts. This was both because some of the "gently used" cylinders and smoke stacks I'd bought had developed cracks and looked slightly different from the NWRR engine. (Note; All these new parts will eventually be available on Shapeways for you DIYers.)
At this point there are a number of options on reworking the cab; using it as is, using the snap-in panel spares which were made for the Disney Big Thunder Railway Starter Set, making half or full inserts from Evergreen 4250 Siding, machining the front window out and fully milling the side panels. There are also options on the smoke stack and headlamp, depending on your budget and need for a fully authentic look.
"Looks about Right" Scale
The NWRR was 30" gauge. G gauge track is 1.77" between the rails. That's a scale of 1:17:1 for an accurate Gn30 model. LGB's G Scale Engines were intended to represent 1 meter (39") gauge European track and are therefore 1:22 scale.
Staying with the 30" gauge scaling; The 4"wide cab on the G Scale LGB Porter is equal to 68" full size and the 5 7/16" cab height scales to 92". The width and height of the NWRR engine were 52" and 84", so our LGB NWRR stand-in is about 1" wider and 1/2" taller than it should be.
 |
| Full Size Engine |
The scale of the headlamp, sand and steam domes, whistle, bell and smoke stack all make a statement regarding the size of the engine. When I first set out to do this project I was trying to keep the changes to a minimum. That led to a couple of compromises, the first having to do with the molded in LGB steam dome size.
Looking at pictures of the as-built headlamp, steam sand domes, my original headlamp looked too small. For the next build, I scaled up both the headlamp and the steam dome. The results were mixed; The headlamp mounts looked too long and the sand dome too large, but the shortened smoke stack looked just about right.
 |
| Too Large, Too Small or Just Right? |
Oh, so Tender
I noticed some Kalamzoo G Scale Tender body parts for sale on eBay at a bargain basement price, so I picked up a set to experiment with. This set of parts were cut down to correspond to the overall length of the NWRR tender. Doing so required cutting over 2" off the side panels and top.
 |
| Kalamazoo Tender Parts |
 |
| NWRR Side View |
As you can see, the tender is fairly short compared to both the engine and ore car. The hopper of the ore car was eight feet long. Bob Gurr told me that the full size NWRR Tender was build on top of a Mancha electric mine engine which was about 9 feet long, possibly the Titan A or Bearcat model;
 |
| Mancha Titan A Battery Storage Locomotive |
Here's an image of the first pass at a tender;. It's not perfect, but since we're kit-bashing we're looking for it to "feel right" more than to be at an exact scale.
 |
| Prototype Tender Body Shell |
But weight, There's More!
 |
| LGB saddle tank weight and replacement cab weights |
Recall that we removed the saddle tank weight along with the tank shell. That left us with a little problem, as the saddle tank weight is important. On some models there is also a half cylinder shaped weight inside the top half of the boiler shell. These weights increase the friction between the driving wheels and the rails. Something needs to be added back to make up for the loss of the saddle tank weight. To accomplish this I made two ten-ounce weights from mild steel plate, 3/4" thick by 1 3/4" square, which easily fit the available space between the boiler shell can cab side walls. That added 20 ounces right over the rear driving wheels. These weights were screwed to the cab floor.
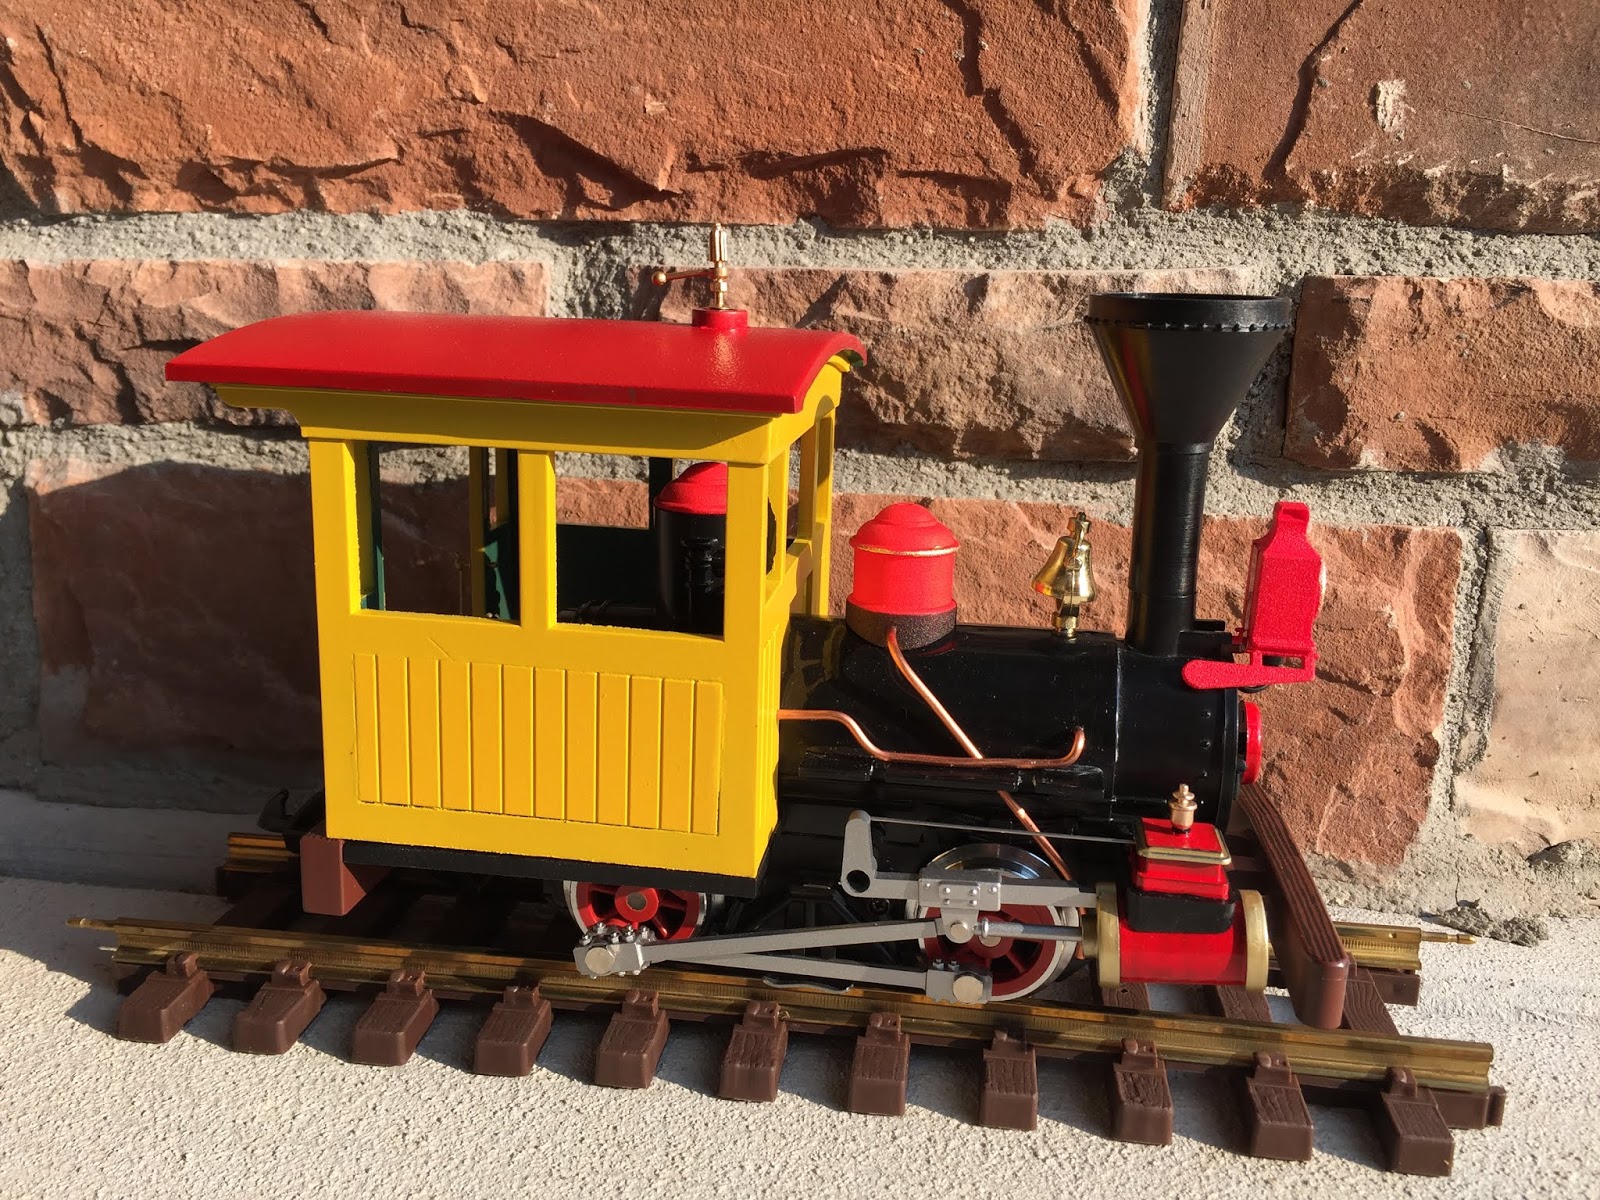
And here are the photos of the finished #1 and #3 engines, ready to roll;
If you are interested in parts for your own conversion, post a message to me here or at dwmfrancis@gmail.com and visit us at our
Vintageland Facebook page.
Here are images of the tender and ore car which were built from a Bachmann Lil' Big Hauler's tender and Hartland Locomotive Works Mini Gondola;


This is fantastic. Way beyond my skill level.
ReplyDeleteI built one of these from an LGB Porter. I made the tender out of styrene using an LGB ore car as a base. I made 5 passenger cars out of styrene as well and used Hartland mini flat cars as a base. Sam Towler was kind enough to help me when I got stuck. I'd be happy to send you some pictures if you want.
ReplyDeleteBrent - By all means, please contribute as many pictures as you'd like!
Delete